Office Address
Seville, Spain
Seville, Spain
Phone Number
+(34) 624 816 969
Seville, Spain
Seville, Spain
+(34) 624 816 969


 by ForgeNEX
 Table of contents [Show]
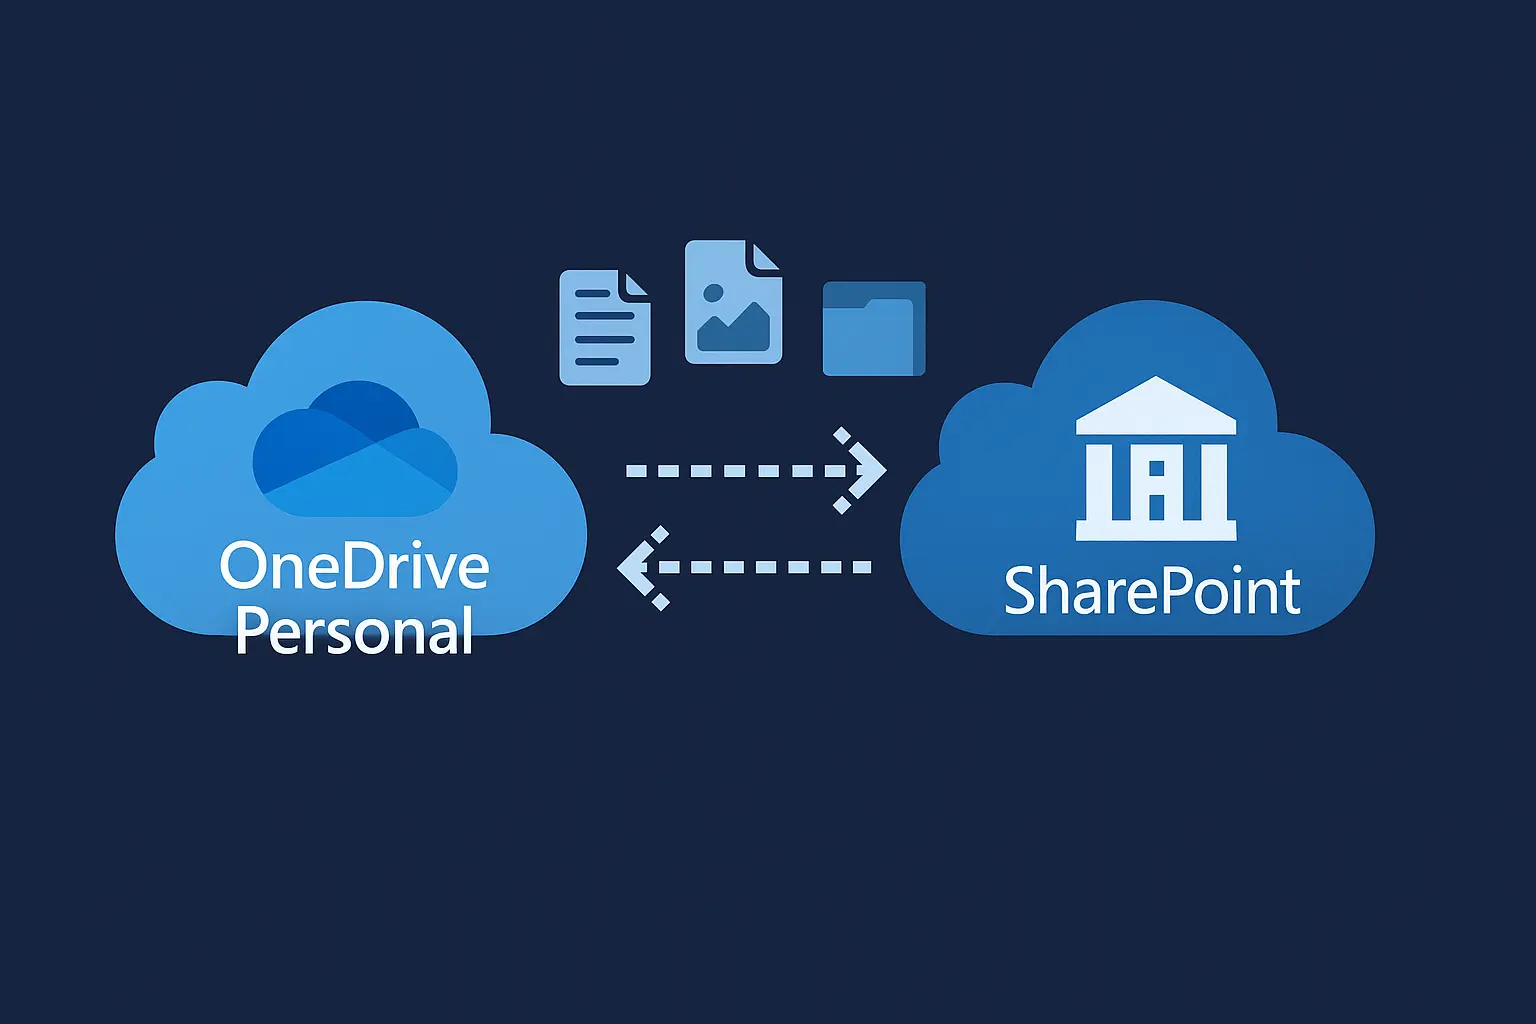
More and more companies and professionals are migrating their personal or shared data to corporate Microsoft 365 environments.
The problem arises when a personal OneDrive has accumulated hundreds of gigabytes and there is no practical way to move them to the company's SharePoint without downloading them first.
That's where Rclone comes in, a cross-platform command-line tool that allows you to transfer data directly between clouds — without consuming local space, without logging in through a browser, and without relying on slow synchronizations.
Rclone is a powerful "Swiss Army knife" for the cloud. It allows you to connect services like OneDrive, SharePoint, Google Drive, Dropbox, S3, etc., and move or sync data directly between them.
Key advantages:
It doesn't download or temporarily save files.
It supports encryption, integrity checks, and speed limits.
It's free and stable (used by thousands of sysadmins).
It works the same on Windows, macOS, and Linux.
Before you start, you need to configure two remotes in Rclone:
one for your personal OneDrive and another for the corporate SharePoint.
Open a terminal and run:
An interactive menu will appear.
Select:
Rclone will open a browser window for you to log in with your personal account (e.g., [email protected]).
When finished, save the configuration.
Repeat:
When Rclone asks for the SharePoint type, select the option:
The browser will open: log in with your corporate Microsoft 365 account and authorize it.
Once completed, you will have two destinations configured:
personal: → your personal OneDrive
company: → your organization's SharePoint
You can list their folders like this:
In the site URL (for example):
the path after /sites/ (in this case "Documents") will be the base of the destination.
In Rclone, you will set it up like this:
Now for the good part: moving everything without using local space.
Basic copy example:
What each parameter does:
copy: copies files without deleting them from the source.
--create-empty-src-dirs: preserves the folder structure.
--progress: shows transferred files in real-time.
--transfers 4: number of simultaneous file transfers.
--drive-chunk-size: improves speed for large files.
If you prefer to sync (exactly mirror the source), use:
(Note: "sync" deletes anything in the destination that doesn't exist in the source, ideal only for final migrations).
Microsoft applies temporary limits if it detects massive transfers.
You can reduce the load with:
This limits the traffic and prevents the HTTP 429 (Too Many Requests) error.
When it finishes, you can compare the total size of both locations:
And if you want to validate the integrity:
Rclone saves partial information about uploads.
If the connection is lost or Microsoft pauses access, simply repeat the same command:
it will only retry the incomplete files.
For large migrations (over 500 GB), it's a good idea to schedule the task to run nightly using cron (Linux) or Task Scheduler (Windows).
Example in Linux:
and add:
If you are moving confidential information (contracts, invoices, etc.), you can encrypt on the fly:
and create a new remote of type crypt linked to the destination SharePoint.
Example:
This way, the files will be automatically encrypted upon arrival.
With rclone, migrating data between OneDrive and SharePoint without downloading it is simple, fast, and completely controlled.
For administrators or IT technicians managing Microsoft 365 infrastructures, it has become an indispensable tool: transparent, repeatable, and independent of slow sync clients or limited interfaces.
If you work in mixed environments (personal OneDrive, corporate, or Google Workspace), Rclone gives you a common language to move data between clouds frictionlessly.